 Hey! Check this out! Here's how you do it: First find the supplies. They are crayons, a canvas, a hot glue gun and a hair dryer. By the way this ONLY works with Crayola Crayon! Don't try to use any other crayons. I learned that the hard way.. First hot glue the crayons to the canvas. Then plug in your hair dryer and hold the canvas at an angle. Use the hair dryer to melt the crayons until the right length for you. Let it dry (it won't take long) and draw hearts or any other design you want at the bottom! Have fun!
Monday, August 26, 2013
Melt Your Heart Crayon Tutorial
Hey! Check this out! Here's how you do it: First find the supplies. They are crayons, a canvas, a hot glue gun and a hair dryer. By the way this ONLY works with Crayola Crayon! Don't try to use any other crayons. I learned that the hard way.. First hot glue the crayons to the canvas. Then plug in your hair dryer and hold the canvas at an angle. Use the hair dryer to melt the crayons until the right length for you. Let it dry (it won't take long) and draw hearts or any other design you want at the bottom! Have fun!Monday, August 19, 2013
Cereal boxes for paper storage!
Make this cute holder to store your papers in!

You will need: 3 cereal boxes that are the same size, scotch tape, and wrapping paper!
Tape or glue the boxes together. Wrap them like a present, and leave the front part open (make sure to cut off the flaps at the top!). Use it to store paper, letters, and magazines!
Garden Bugs!


Thursday, August 8, 2013
Wooden Letters!

A wooden letter from Hobby Lobby, spray paint from Walmart, a flower bow from Hobby Lobby, some fabric from Hobby Lobby, a hot glue gun, and hot glue sticks. That's all you need to make this adorable letter for your room! So firstly, spray paint the letter. To match your room of course. Then when it completely dry, hot glue the flower to the corner. Then you want to hem the edges and we just used our hot glue gun instead of a sewing machine (mainly because it works just a well and is faster). We measured the fabric so it would fit perfectly across. We hot glued it on and we didn't put glue on it all the way around just the back (because if we take it off we won't want the hot glue to stay on) . Then we hemmed the edges for the top and glued it to the letter. We tied a bow and hung it up! Have fun!
Wooden Frames!!
.JPG)

Another idea! So here it is: You will need, 2 colors of paint, painters tape, a paint brush and a wooden frame. First paint the whole frame one color and let it dry. After it dries, use the painters tape to make stripes across the frame. Then use the other color of paint to paint the stripes. Then take the painters tape off and your done!
Monday, August 5, 2013
Money Jar!!
An ordinary mason jar to an adorable jar to hold your money or just a cute jar!
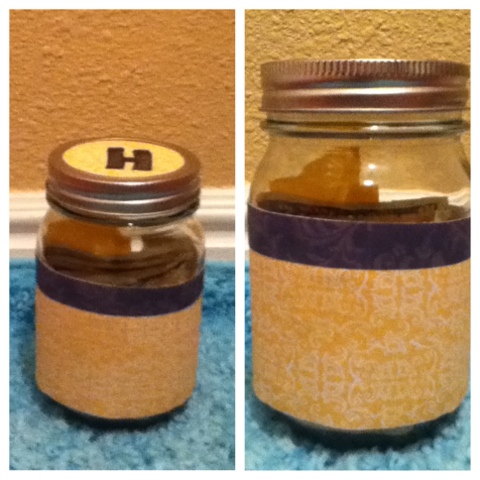
So the supplies are: tape, scrapbook paper, a glue stick, and of course a mason jar! First you have to cut the scrap book paper to size. A little space on the bottom and some on the top. And you have to measure the top of the lid too. To put the outline around the top, cut the different paper smaller and glue it to the top. Now when you tape it on, you have to roll the tape and place it on the scrapbook paper and then put it on the lid or around the jar. Then your done! Enjov!
Friday, August 2, 2013
Ridiculously Tiny Bows!
How to make really cute bows with just a fork, scissors, and ribbon!

You will need: A dinner fork with 4 points, scissors, a thin ribbon about 4-5 inches long, and another ribbon that is about 3 inches long.

First, using the longer ribbon, weave it up and under the points of the fork, starting under the first point. When you get to the end of the row, turn around and make another row back through. Keep doing this until you have 5 rows.


Next, grab your 3 inch ribbon and tie it in the middle of the rows as shown below.

Then, slip your bow off the fork and cut off the rest of the 3 inch ribbon and you can shorten your 4-5 inch ribbon if you want.

These bows are perfect for cards! And just plain adorable!
Thursday, August 1, 2013
Redesigning a bulletin board!

You first have to divide your bulletin board into 6 equal sections. With the painter's tape. Decide on 2 of the squares to be blank which means you don't want fabric or anything on it. Cover that in painter's tape too. The whole square so that you don't spray paint it. Then, you have to spray paint the wooden boarder.
While its drying you need to chill. Relax. All this crafting should make you tired. :)
After its dry, cut the fabric to the size of the squares. 2 of one fabric and 2 of the other fabric. After you cut it, hot glue it to the squares. Make sure you get the fabric under the boarder.
Once you have glued all the fabric, cut the ribbon so it's the perfect length of the bulletin board. Then just glue it. Hang it up and your done!!
How to Redecorate an Ugly Stool.... By Haylie

Subscribe to:
Posts (Atom)